
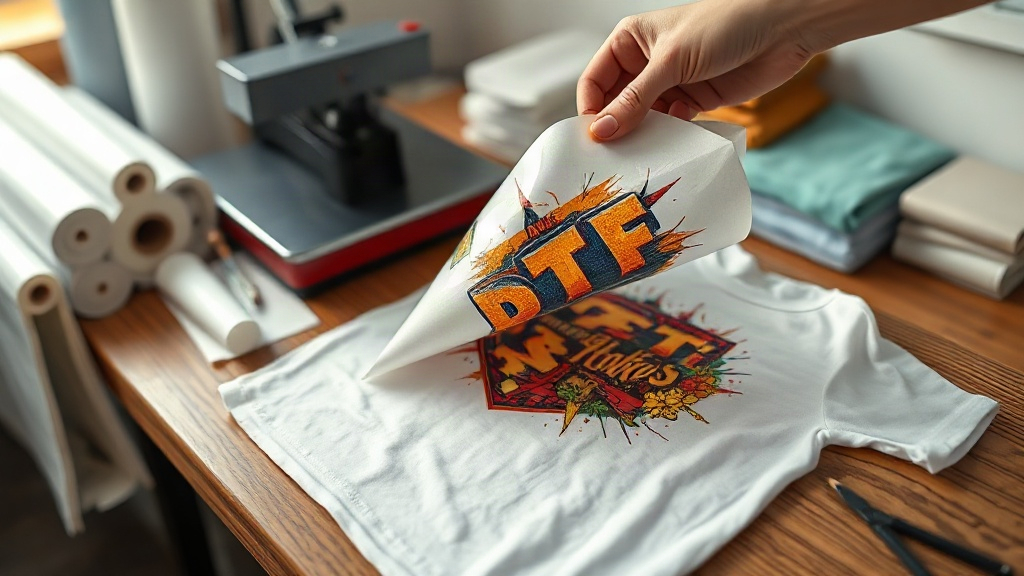
When I first heard about DTF transfers, I was skeptical. As someone who has spent years experimenting with heat transfer vinyl, screen printing, and even direct-to-garment printing, I thought I had seen it all. But DTF, which stands for Direct-to-Film, promised something different: full-color, highly detailed designs that could be applied to almost any fabric without the hassle of weeding or the limitations of color layers. Intrigued, I ordered a starter kit and put it to the test. What I discovered was a game-changer for small businesses, crafters, and anyone who wants professional-looking custom apparel without a professional setup. In this guide, I'll share my firsthand experience with DTF transfers, from creating the design to pressing it onto a shirt, and give you practical tips to avoid common pitfalls.
What Are DTF Transfers?
DTF transfers are printed on a special film using a DTF printer. The process involves printing a design with water-based inks onto a PET film, then applying a powder adhesive to the wet ink. After curing the powder, the transfer is ready to be heat-pressed onto fabric. Unlike DTG, which prints directly onto the garment, DTF allows you to print on a wide range of materials, including cotton, polyester, blends, and even nylon. The result is a soft, stretchable print that holds up well to washing.
One of the biggest advantages of DTF transfers is the ability to print white ink. This means you can create vibrant designs on dark garments without the need for a white underbase, which is often required in DTG printing. The colors pop, and the details remain sharp, even with intricate patterns.
Why Choose DTF Transfers Over Other Methods?
If you're like me, you might be wondering how DTF compares to heat transfer vinyl (HTV) or screen printing. Here's a quick breakdown:
- No weeding required: With HTV, you have to cut and weed the design, which is time-consuming and tricky for complex artwork. DTF transfers come ready to press, saving hours of labor.
- Full-color capability: Screen printing requires a separate screen for each color, making multi-color designs expensive and labor-intensive. DTF prints unlimited colors in one go.
- Works on multiple fabrics: Unlike DTG, which works best on 100% cotton, DTF adheres to cotton, polyester, blends, and more.
- Durability: When applied correctly, DTF transfers withstand dozens of washes without fading or cracking.
That said, DTF isn't perfect for every situation. For large orders of simple one-color designs, screen printing might be more cost-effective. But for small batches, complex designs, or personalization, DTF shines.
How to Create and Apply DTF Transfers: A Step-by-Step Guide
Based on my trial and error, here's a streamlined process to get you started with DTF transfers.
Step 1: Design Your Artwork
Start with a high-resolution image (300 DPI is ideal). DTF printers can handle fine details, so don't shy away from gradients, photos, or small text. However, keep in mind that very thin lines might not transfer perfectly. I recommend using design software like Adobe Photoshop, Illustrator, or free alternatives like GIMP or Inkscape. Once your design is ready, you'll need to print it in reverse (mirrored) onto the DTF film. Most DTF printer software does this automatically, but double-check before printing.
Step 2: Print on DTF Film
Load your DTF printer with DTF ink and PET film. The printer will lay down a layer of white ink first (if your design has white or light colors), followed by CMYK. This ensures opacity on dark fabrics. After printing, while the ink is still wet, sprinkle hot-melt adhesive powder evenly over the design. Shake off the excess, then cure the powder using a heat press or a dedicated curing oven. The powder should melt and become glossy, indicating it's ready.
Step 3: Prepare Your Fabric
Pre-press your garment for a few seconds to remove moisture and wrinkles. This step is crucial; any moisture can ruin the transfer. Set your heat press to the recommended temperature (usually 300-325°F or 150-160°C) and medium pressure.
Step 4: Apply the Transfer
Place the DTF transfer on the garment with the printed side facing up. Cover it with a Teflon sheet or parchment paper to protect the press. Press for 10-15 seconds. For best results, peel the film while it's still warm (warm peel). If you wait until it's cold, the adhesive might set too hard and cause the design to crack. After peeling, give it a second press for 5-10 seconds with the Teflon sheet to ensure full adhesion.
Step 5: Post-Press and Care
Allow the garment to cool completely before wearing or washing. Turn the garment inside out and wash in cold water with mild detergent. Avoid fabric softener and bleach, and tumble dry on low or hang dry. With proper care, your DTF transfer will last for the life of the garment.
Common Mistakes to Avoid with DTF Transfers
Even with the best intentions, things can go wrong. Here are pitfalls I encountered and how to sidestep them:
- Insufficient powder application: If you don't apply enough adhesive powder, the transfer won't stick. Make sure the entire design is covered, but shake off excess to avoid a messy texture.
- Incorrect pressing temperature: Too hot and the film might melt or the ink might scorch; too cold and the adhesive won't activate. Always test with a scrap piece first.
- Peeling at the wrong time: DTF transfers are typically warm peel. If you let them cool completely, the adhesive can bond to the film instead of the fabric, leading to a ruined design.
- Not pre-pressing the garment: Skipping pre-pressing can trap moisture, causing the transfer to bubble or peel.
By avoiding these mistakes, you'll save time, money, and frustration.
DTF Transfers vs. Other Printing Methods: A Quick Comparison
To help you decide if DTF is right for your project, here's a side-by-side look at how it stacks up against popular alternatives.
- DTF vs. HTV: DTF wins for complex, multi-color designs; HTV is better for simple one-color cuts and metallic finishes.
- DTF vs. DTG: DTF works on more fabrics and produces more vibrant colors on dark shirts; DTG is faster for large orders on 100% cotton.
- DTF vs. Screen Printing: DTF is more cost-effective for small batches and detailed art; screen printing is cheaper for bulk orders of simple designs.
- DTF vs. Sublimation: Sublimation only works on polyester and light-colored fabrics; DTF adheres to cotton and dark colors.
Each method has its place, but DTF offers a unique blend of versatility and quality that's hard to beat for custom apparel.
Frequently Asked Questions About DTF Transfers
How long do DTF transfers last on a shirt?
With proper application and care, DTF transfers can last 50+ washes without significant fading or cracking. The key is to follow the pressing instructions and wash the garment inside out in cold water.
Can I use DTF transfers on 100% polyester?
Yes, DTF transfers work on polyester, but you may need to adjust the pressing temperature to avoid scorching. A lower temperature (around 280-300°F) and shorter press time are recommended for polyester.
Do I need a special printer for DTF transfers?
Yes, you need a DTF printer that uses DTF inks and can handle PET film. However, you can also buy pre-printed DTF transfers from suppliers if you don't want to invest in a printer.
What is the best way to store unused DTF transfers?
Store them in a cool, dry place away from direct sunlight. Keep them flat to prevent curling. Properly stored transfers can last for several months.
Can I layer DTF transfers?
Yes, you can layer DTF transfers, but it's best to press each layer separately. Use a lower temperature for the second press to avoid disturbing the first layer.
DTF transfers have opened up a world of possibilities for custom apparel. Whether you're a small business owner, a hobbyist, or someone who just wants to make personalized gifts, this technology delivers professional results with a manageable learning curve. I hope my experience and tips help you get started on your DTF journey. Remember, practice makes perfect, so don't be afraid to experiment and find the settings that work best for your setup.