Attach Embroidered Patches can elevate clothing, bags, and gear with a personalized touch, turning worn items into expressive, durable pieces. This practical guide outlines reliable methods to ensure patches stay put while keeping fabrics looking neat and professional. You’ll learn about iron-on patches for quick setup and carefree placement, along with considerations for fabrics and adhesion. Knowing how to apply patches helps you plan heat, pressure, and timing for a lasting bond. Along the way, patch attachment tips will guide you from alignment to secure stitching for a clean, long-lasting finish.
From a broader perspective, these decorative identifiers on garments are often described as fabric badges or embroidery patches that rely on adhesives, heat, or stitching to secure them. In other words, you can choose patches with self-adhesive backs, sewn borders, or heat-activated bonds depending on the fabric. LSI principles favor mentioning materials like denim, canvas, or jersey and terms such as application technique, heat setting, and final finish to expand relevance. The aim is to help readers recognize durable attachment approaches and to see the same idea expressed in different terms to match varied search queries. By exploring these alternative expressions, you’ll gain a flexible understanding of how patches can be added to clothes, bags, and gear with confidence.
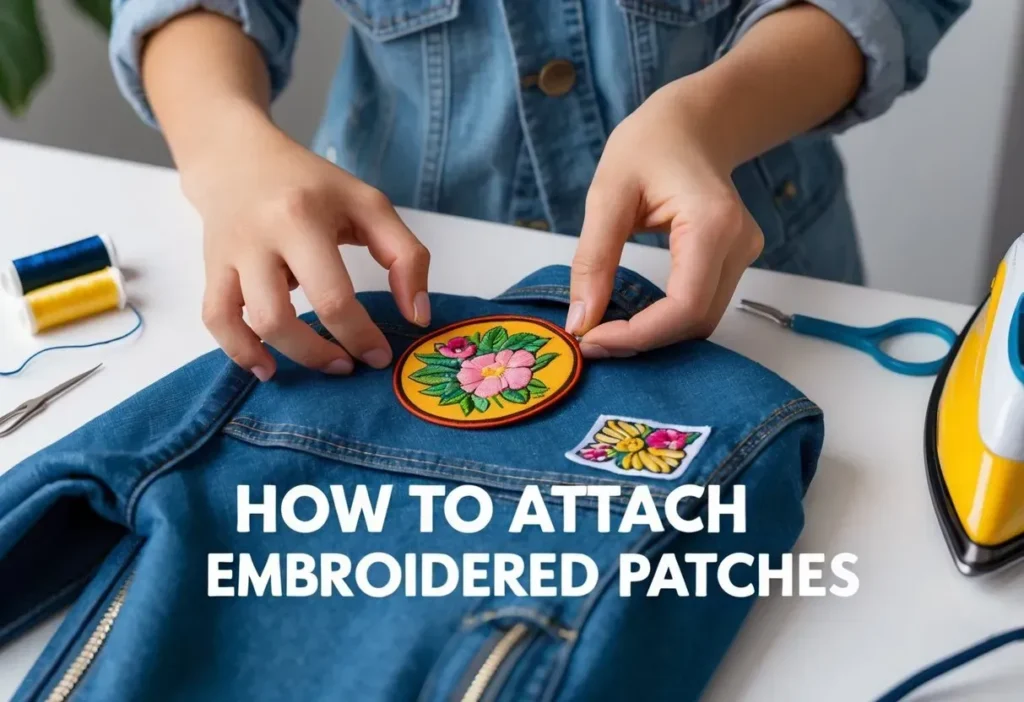
Attach Embroidered Patches: Quick Methods for Immediate Results
Attach Embroidered Patches can instantly personalize jackets, bags, and gear, especially when you need speed without sacrificing durability. Iron-on patches are among the fastest options, making them ideal for denim, twill, and other sturdy fabrics. If you’re wondering how to apply patches quickly, this method combines heat and pressure to create a bond that’s visible but practical for everyday wear.
To maximize results, follow practical patch attachment tips: test adhesion on a scrap fabric, use a protective cloth, and apply consistent heat with enough pressure. While iron-on patches deliver speed, you’ll still want to verify edge security and consider a light stitching reinforcement for long-lasting wear. This blend of efficiency and care helps you Attach Embroidered Patches with a clean, professional look.
Choosing the Right Patch Attachment Method by Fabric Type
Fabric type drives the best patch attachment choice. Denim, canvas, and cotton blends respond well to iron-on or sew-on methods, while stretchy knits may benefit from sew-on patches to avoid edge curling or adhesive failure. For leather or synthetic fabrics, heat-seal patches can offer stronger bonds, sometimes with a hand-sewn edge for extra longevity.
In practice, many projects use a hybrid approach: place the patch with iron-on for quick positioning, then reinforce edges with stitches for durability. When you select patches for backpacks, outdoor gear, or frequent washing, consider the fabric’s tolerance and your care routine. Patch attachment tips like testing on a small area and choosing the right heat setting help ensure a reliable result when you Attach Embroidered Patches.
Iron-On Patches: Fast, Simple, and Effective for Everyday Gear
Iron-on patches offer a fast path to a refreshed look on sturdy fabrics such as denim or twill. The adhesive on the patch activates with heat, bonding to the fabric when pressed with a hot iron. If you’re new to how to apply patches, iron-ons are often the easiest starting point, delivering a clean edge and quick placement.
To secure a lasting bond, test adhesion after cooling and consider a light stitch around the border for high-wear areas. Use a pressing cloth to protect both the patch and the fabric, and avoid sliding the iron to prevent shifting. With mindful application and occasional reinforcement, iron-on patches deliver reliable results in many everyday projects.
Sew-On Patches: Superior Security for Delicate Fabrics and High-Wear Zones
Sew-on patches provide durable, glue-free security, making them ideal for delicate fabrics or areas subjected to frequent movement and friction. Sewing allows you to choose stitches that balance visibility and strength, such as small running stitches, blanket stitches, or whip stitches for heavier patches.
When you sew-on patches, prepare the fabric, temporarily secure the patch, and stitch around the edge with tight, even stitches. Finishing with secured thread and a quick tension check ensures a neat, flat border. This method offers long-lasting durability and is a preferred choice when you need a strong bond for high-wear zones.
Heat-Seal Patches: Strong Bonds for Tough Materials
Heat-seal patches rely on heat-activated adhesives designed for stronger bonds and certain fabrics, sometimes requiring a heat press for the best results. This method is particularly valuable for heavier textiles or fabrics that don’t respond well to traditional iron-on adhesives.
Follow manufacturer guidance for temperatures and timing, using a protective barrier and a clean, flat surface. A heat press or a high-quality iron can be used, but always allow adequate cooling and verify edge adhesion before use. For added longevity on challenging fabrics, you can reinforce with discrete stitches near the edge after setting with heat.
Hybrid Approaches and Care: Prolonging Patch Life
Hybrid approaches blend the speed of iron-on with the security of sewing, offering the best of both methods for backpacks, jackets, and gear exposed to outdoor elements. You can attach a patch with iron-on for quick placement and then add a sew-on border to ensure durability along the edges. This two-step approach is a practical form of patch attachment tips for more demanding applications.
Caring for patched items extends patch life: turn garments inside-out, use gentle wash cycles, and air dry when possible. For workwear or gear that sees frequent washing, re-pressing or re-stitching edges periodically helps maintain adhesion and appearance. By combining methods thoughtfully, you’ll keep patches looking sharp and securely anchored for the long haul.
Frequently Asked Questions
How do I attach embroidered patches using iron-on patches on fabric?
Iron-on patches let you Attach Embroidered Patches quickly. Steps: prep the fabric (clean, flat surface); position the patch; cover with a thin cloth to protect the patch; press with a hot iron at the recommended temperature for 15–30 seconds with steady, firm pressure (no sliding); let cool and check edges. For extra durability, reinforce with a few discreet stitches around the border.
What are the best practices for sew-on patches when attaching embroidered patches, and how to apply patches for durability?
Sew-on patches offer strong, glue-free adhesion. Remove any sticky backing, pin the patch in place, then choose a secure stitch (running or blanket stitch; whip stitch for heavy patches). Stitch around the edge with small, close stitches, tie off securely, and finish with a light press. This sew-on method enhances durability for high-wear areas.
Are heat-seal patches a good option for Attach Embroidered Patches on different fabrics?
Yes. Heat-seal patches can form strong bonds on many fabrics when used with the proper equipment. Follow the patch manufacturer’s guidance for temperatures and timing, use a pressing cloth, apply steady pressure with a heat press or iron, then allow to cool and verify adhesion. Reinforce with edge stitches if the project will see heavy use.
What are useful patch attachment tips to ensure durability when attaching embroidered patches?
Patch attachment tips include testing on a scrap fabric to gauge adhesion and heat tolerance, using a pressing cloth, aligning the patch precisely, matching the thread color to the border, and pinning or basting on curved surfaces. For heavy-duty items, add a backer fabric or interfacing and consider a hybrid approach (iron-on placement with a sewn edge) for longevity.
How can I apply patches on curved or textured surfaces when Attach Embroidered Patches?
On curved or textured surfaces, pin or baste to maintain alignment, place the patch centered, and work from the center outward. Use small, close stitches along the border and, if needed, follow with a light hand-stitch reinforcement to prevent edge curling and ensure a flat, neat finish.
What should I do if patches won’t adhere after washing when Attach Embroidered Patches?
Troubleshoot by repressing with a pressing cloth and appropriate heat, and check fabric compatibility. If adhesion remains weak, switch methods (sew-on or heat-seal) as recommended by the patch maker, and reduce wash temperature or avoid tumble drying high heat to protect the patch.
| Topic | Key Points |
|---|---|
| Overview | Attach Embroidered Patches can elevate clothing, bags, and gear. Three attachment methods are covered: iron-on, sew-on, and heat-seal. Includes practical tips, troubleshooting, and aftercare. |
| Materials Needed | Iron-on: iron, clean surface, thin cloth or parchment; Sew-on: matching thread, needle, scissors, pins or fabric glue; Heat-seal: heat press or iron with appropriate heat and a protective barrier. |
| Patch Options | Iron-on: quick placement on sturdy fabrics. Sew-on: no glue, ideal for delicate/high-wear areas. Heat-seal: stronger bonds for tougher fabrics. Hybrid approaches mix benefits. |
| Choosing Method by Fabric | Fabric type matters: denim/canvas/cotton blends suit iron-on/sew-on. Jersey/knits often safer with sew-on. Leather/synthetics may need heat-seal or combined methods. Reinforce edges when washing‑heavy gear. |
| Iron-on Steps | 1) Prep surface: wash/dry and flatten. 2) Position and protect: place patch, cover with cloth/parchment. 3) Apply heat: iron at recommended temp; press 15–30s without sliding. 4) Check adhesion: test edge; re-press if needed; cool before testing. 5) Optional finish: add stitches at edges for security. |
| Sew-on Steps | 1) Prep: clean flat surface; remove sticky backing if any. 2) Secure: pin or glue patch in place. 3) Choose stitch: running/blanket; whip stitch for heavy patches. 4) Start stitching: around edge, tight stitches. 5) Finish: trim threads and test tension. |
| Heat-seal Steps | 1) Follow manufacturer temps/timing. 2) Prepare: flat surface; use pressing cloth. 3) Equipment: heat press ideal; iron can work for lighter fabrics; apply steady pressure. 4) Cool and verify: allow to cool; check adhesion. 5) Reinforce if needed: add decorative or invisible stitches. |
| Hybrid Approaches | Combine methods for durability: iron-on for placement, then sew-on border around the edge. Great for bags, jackets, and gear that will be washed or exposed to outdoor elements. |
| Practical Tips |
|
| Troubleshooting |
|
| Care & Maintenance |
|
| Patience & Practice | Attach Embroidered Patches is a craft and practical skill. Understanding the strengths and limits of each method lets you tailor approaches per project for a durable, professional look. |
Summary
Conclusion